
This Easy Extra Flaky Gluten Free Pie Crust is made with five simple ingredients and is so delicious! It’s perfect for holidays or weeknight chicken potpies.
Jump to Recipe
FOR MORE GLUTEN-FREE RECIPES, TRY THESE TRIED-AND-TRUE RECIPES. FOR GLUTEN-FREE PEANUT BUTTER COOKIES, GLUTEN-FREE FUDGE BROWNIES AND GLUTEN-FREE SUGAR COOKIES. MY CLASSIC GLUTEN-FREE CHOCOLATE CHIP COOKIES ARE ALSO ALWAYS A HIT!
I have been making pie crusts from scratch since I was about 10 years old. Baking has always been one of my favorite hobbies! Especially making ‘pretty’ food. I have taken my favorite pie crust recipe and converted it into a gluten-free pie crust everyone is sure to love.
So many are intimated at making a from-scratch pie crust-let alone gluten free! I assure you this recipe is easy to follow and so delicious whether you serve it for dinner or dessert.
Ingredients for Easy Extra Flaky Gluten Free Pie Crust
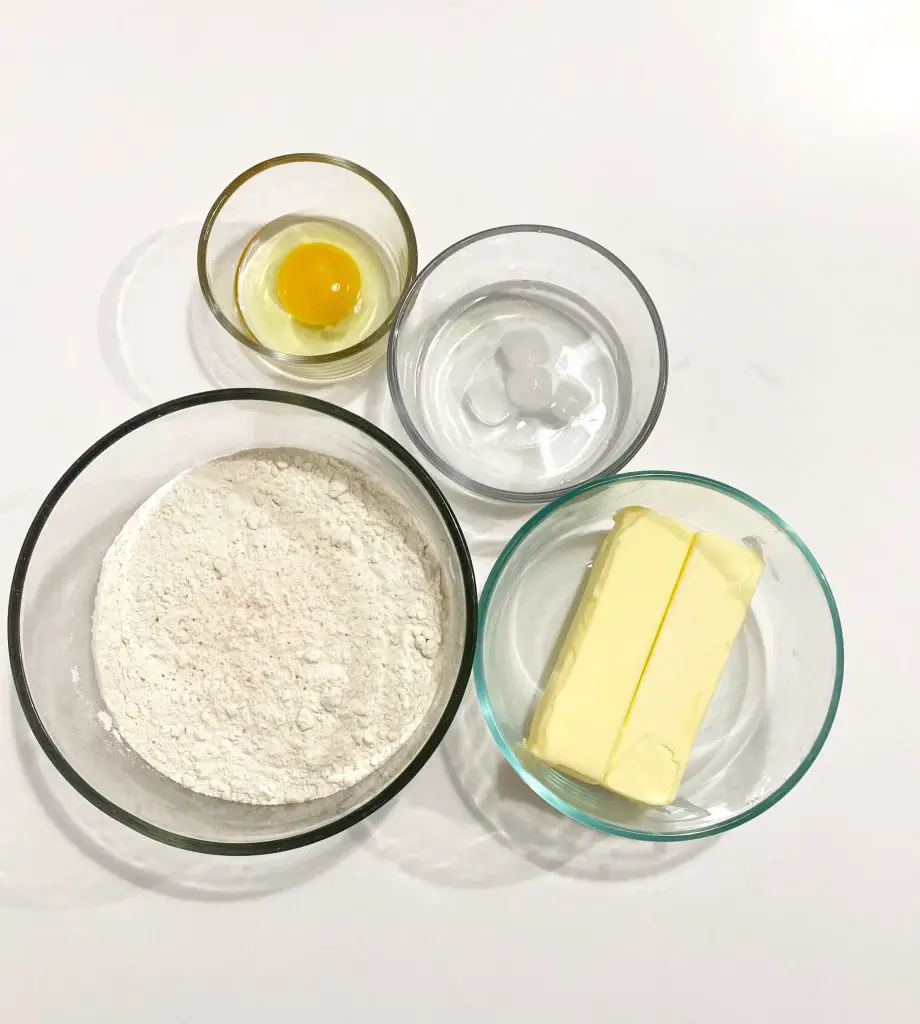
- 2 Cups Gluten Free Flour like King Arthur Gluten-Free Flour blend
- 1/2 tsp Salt-I used Pink Himalayan but you can use your salt of choice.
- 1 Cup Butter– For best results, make sure it is cubed and very cold! (For a dairy-free version-substitute with Earth Balance Vegan Buttery Sticks or your preferred butter substitute for baking. Just be sure it is in stick form as this works best for baking! Coconut oil is NOT recommended.)
- 1/4 Cup-cold water– The colder the better so I add ice to mine!
- 1 Egg-Acts as a binder. **I have not tried this recipe with an egg substitute.
Step-By-Step Instructions for Gluten Free Pie Crust
- First, start by gathering your ingredients and get them nice and cold.
- Whisk the egg with 1 tbsp of the water and pop it back into the fridge.
- Cube the butter then put it into the freezer for at least 15 minutes-careful not to leave it in too long. We want it cold-not frozen!
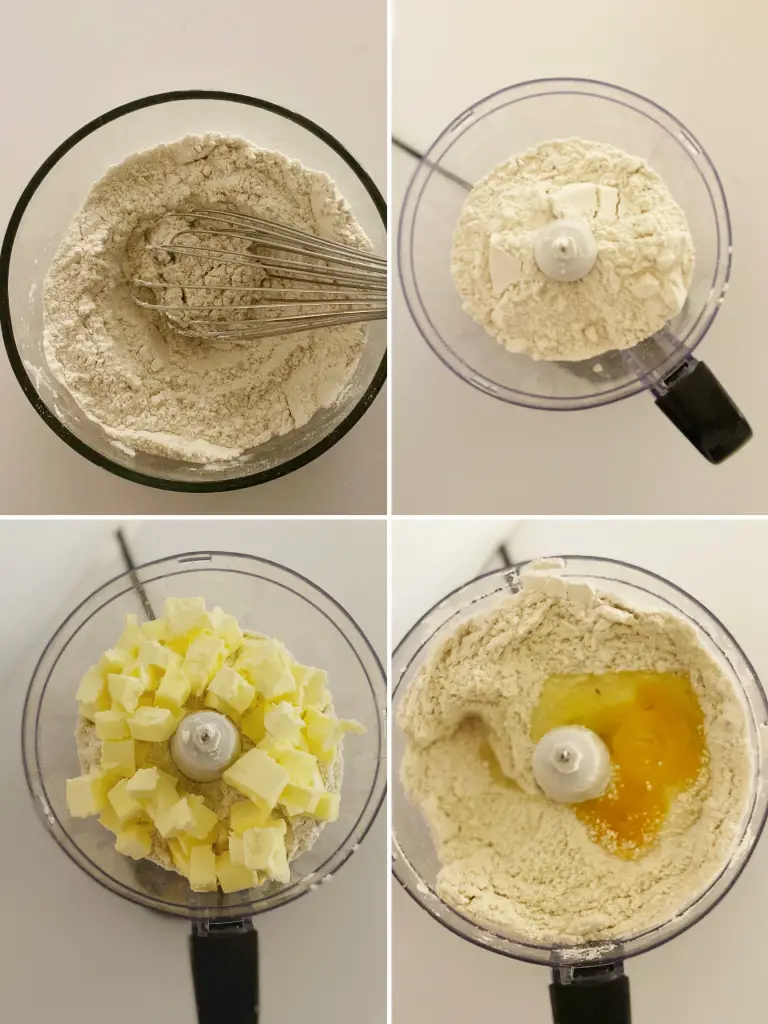
- Whisk the flour and salt together. Pop it in the freezer for a few minutes along with bowl.
- Place the flour mixture in your bowl (I use my food processor but you can also use your mixer) with the cubed butter.
- For the food processor, pulse together until the butter is flattened leaving some larger chunks. Add the egg and pulse together until incorporated.
- If using a stand mixer, turn the mixer to low and mix until the butter is flattened leaving some larger chunks.
- Knead the dough together with clean hands until it begins to come together. Add ice water by the teaspoon only if necessary for the dough to hold together.
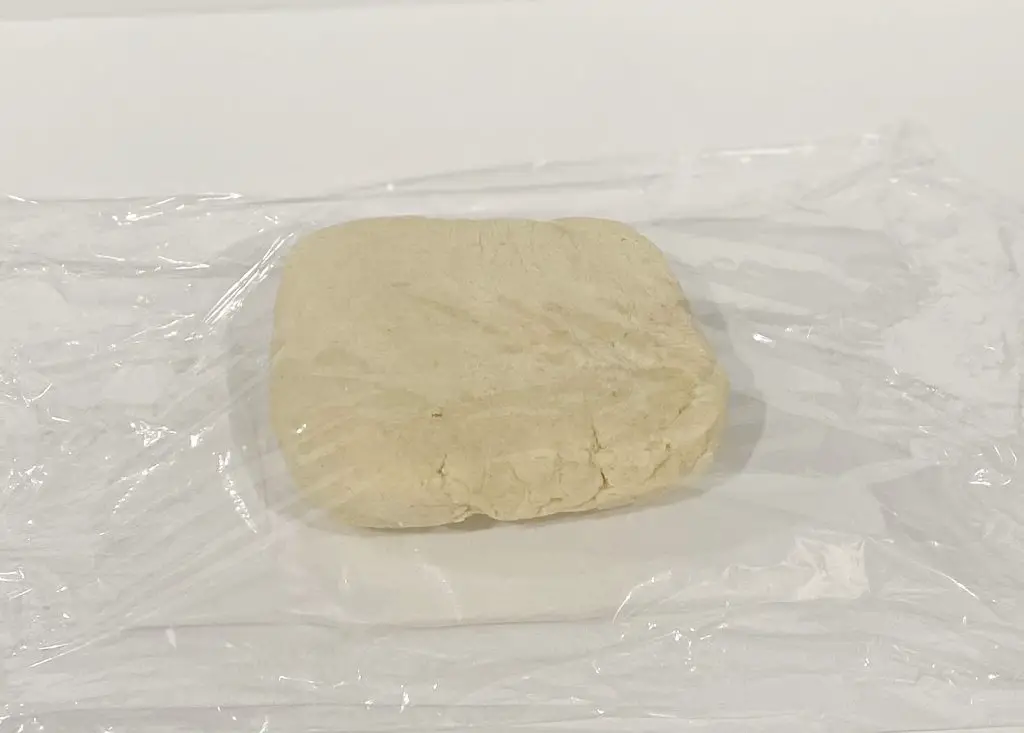
- Turn the dough out onto a sheet of plastic wrap, and press into two disks as you close the plastic wrap around the dough. Place the dough in the refrigerator to chill for 30 minutes.
- Preheat oven to 375F. Generously grease two 9-inch pie pans and set aside.
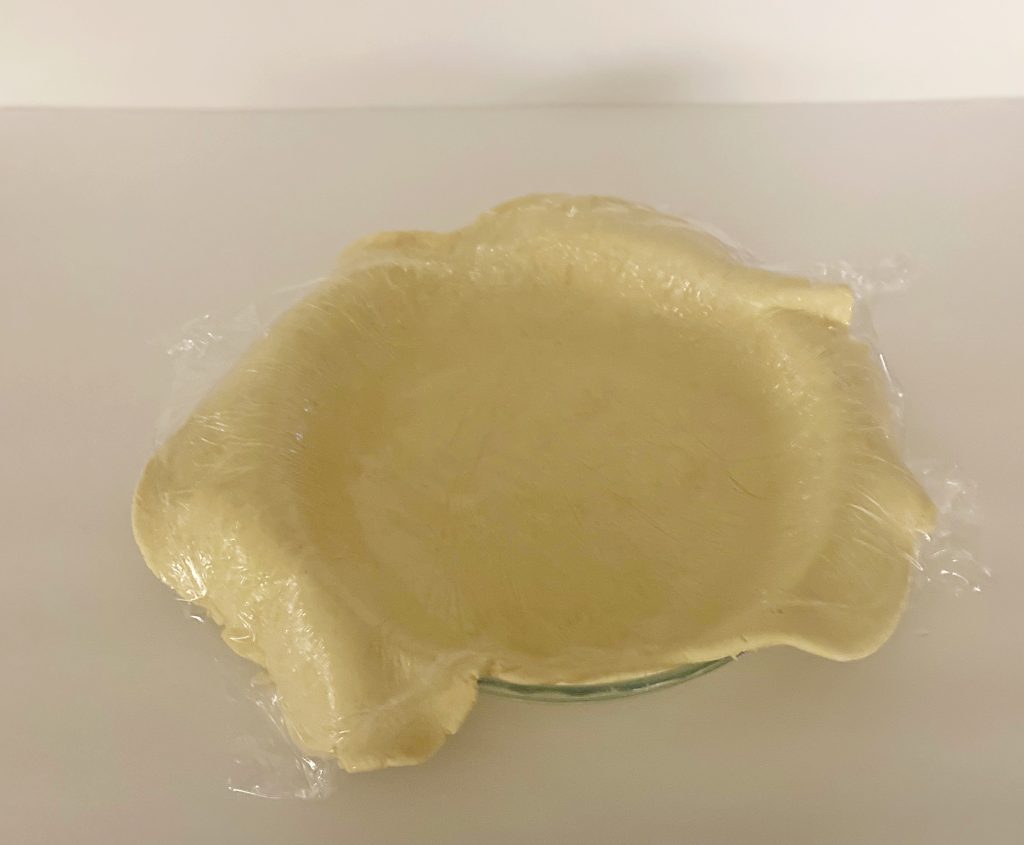
- To prevent over-flouring, I like to use plastic wrap to roll out the dough. Lightly sprinkle with GF flour and then roll out between plastic wrap (it also makes it easier to transfer to pie pan!).
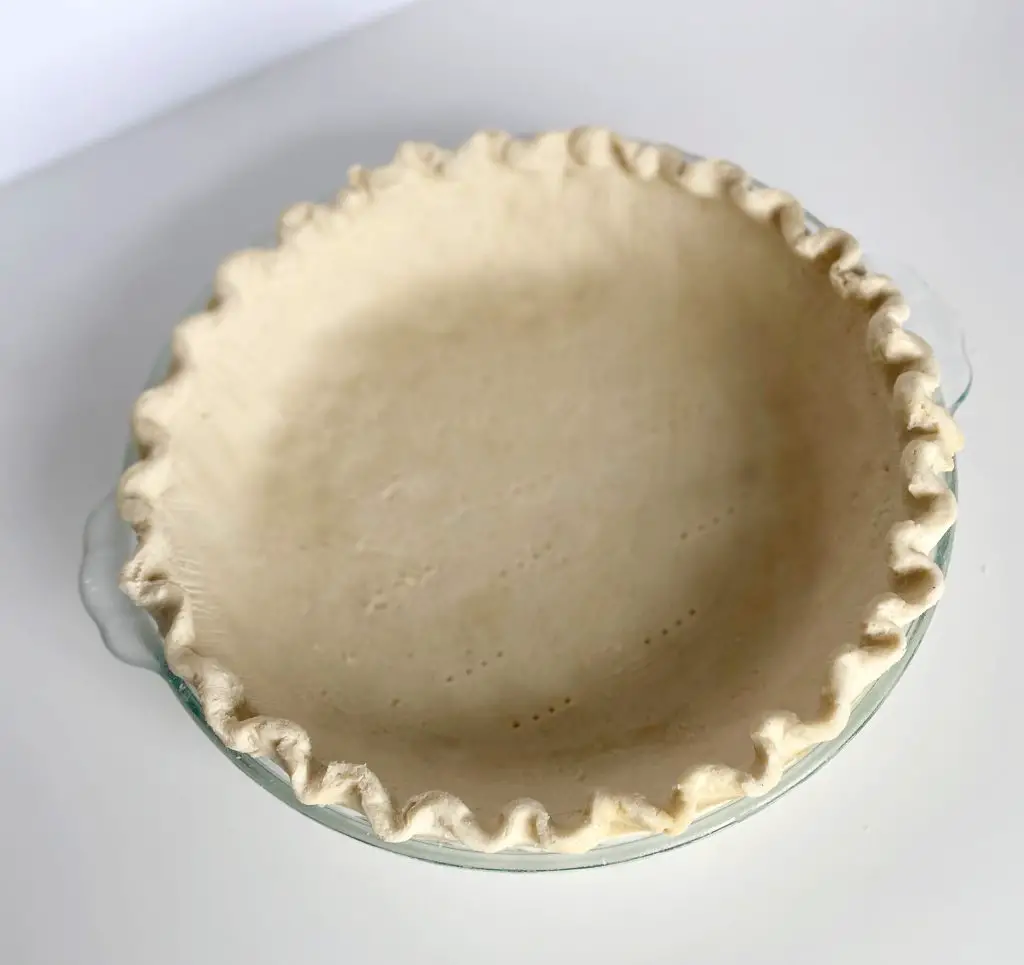
- Remove one layer of plastic wrap and gently transfer to pie pan, removing second layer of plastic wrap. Crimp edges as desired and bake until golden brown!
PARBAKE THE CRUST.
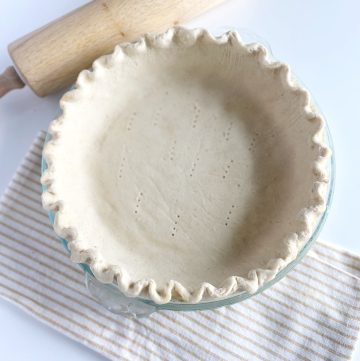
- Remove the pie crust from the refrigerator and unwrap. Once dough is rolled out to shape of pie pan, place in pan. Pierce the bottom of the pie crust all over with a fork.
- Place a sheet of parchment paper on top of the raw crust and cover the bottom of the crust with pie weights or dried beans.
- Place in the center of the preheated oven and bake until the crust is lightly golden brown on the edges, about 10 minutes.
- Remove the pie weights and parchment and allow the crust to cool before proceeding with your recipe.
Tips For A Flawless Crust
- The chunks of butter are important! The larger chunks of butter are what create a flaky pie crust. I prefer to use a food processor for my crust so that the heat of my hands doesn’t melt the butter as I incorporate it. You just have to be careful that you don’t pulse too much and get the butter too small.
- If you’re not dairy-free, substitute sour cream for the ice water. It makes for a very tender dough!
- Use plastic wrap to roll out your dough. This helps prevent drying out the dough by adding too much flour when rolling it out. It also makes it easier to transfer it to your pie pan.

Easy Flaky Gluten Free Pie Crust
Equipment
- 1 Food Processor optional
Ingredients
- 2 Cups Gluten-Free Flour 1:1
- 1 Cup Butter (Cold)
- 1 Egg
- 1/2 tsp Salt
- 1/4 Cup Cold Water
Instructions
- Gather ingredients and get them nice and cold
- Whisk the egg with 1 tbsp of the cold water and pop it back into the fridge.
- Cube the butter then put it into the freezer for about 15 minutes-careful not to leave it in too long. We want it cold-not frozen!
- In a separate mixing bowl whisk together the flour and the salt and chill in freezer for a few minutes.
- Place the flour mixture in your bowl (or food processor if using one) with the cubed butter and pulse together leaving some larger chunks. If using a stand mixer, turn the mixer to low and mix until the butter is flattened leaving some larger chunks. Add the egg and mix until combined.
- With clean hands, knead the dough together until it begins to come together. Add ice water by the teaspoon only if necessary for the dough to hold together.
- Turn the dough out onto a sheet of plastic wrap and press it into two disks as you close the plastic wrap around the dough. Place the dough in the refrigerator to chill for 30 minutes.
- Preheat oven to 375F. Generously grease two 9-inch pie pans and set aside.
- To prevent over-flouring, I like to use plastic wrap to roll out the dough. Lightly sprinkle with GF flour and then roll out between plastic wrap (it also makes it easier to transfer to pie pan!).
- Remove one layer of plastic wrap and gently transfer to pie pan, removing second layer of plastic wrap. Crimp edges as desired and bake until golden brown. Enjoy!
Notes
- Remove the pie crust from the refrigerator and unwrap and discard the plastic. Pierce the bottom of the pie crust all over with a fork.
- Place a sheet of parchment paper on top of the raw crust and cover the bottom of the crust with pie weights or dried beans.
- Place in the center of the preheated oven and bake until the crust is lightly golden brown on the edges, about 10 minutes.
- Remove the pie weight and parchment and allow the crust to cool before proceeding with your recipe.