Everything you love about a festive Valentine Sugar Cookie, minus all the gluten and dyes.
Jump to Recipe
I don’t know about you, but we love Valentine’s Day around here! It’s more of a family affair than a mushy, gushy holiday for us. We love to get the kids special cards, fun little gifts and just celebrate the day together. We’re also homeschoolers so we usually get together with our friends and just make a party out of it.
But it just so happens that me eldest daughter is allergic to red dyes. Many others too, but mostly red and she’s also gluten sensitive. If you’re not familiar with Valentine’s Day, just about every festive food and/or candy (yes, even some chocolate) has red dye in it. It’s unfortunate! As a new food allergy mom, I was completely overwhelmed when our first Valentine’s Day rolled around. Now that I have a few years under my belt, it’s less intimidating and I have a few ‘go-to’ recipes. It’s also helpful that they have come a long way with dye free options!
These gluten-free, dye-free Valentine sugar cookies are some of our favorite ‘go-to’ cookies for events, holidays and parties. They’re always a crowd pleaser! They hold their shape well without being dry and crumbly, which is a win in my book. I like my cookies soft- not crunchy. They come together very easily and only require a few simple ingredients.
Ingredients:
- 1 1/3 Cup Unsalted Butter
- 1 1/2 Cup Sugar
- 2 Eggs
- 1 tsp Vanilla
- 4 Cups Gluten Free Flour (1:1 ratio)
- 1 tbsp Baking Powder
- 1/2 tsp Salt
- 3 tbsp Whole Milk or Milk Substitute
This sugar cookie dough is easy to work with, tastes great, and really holds it’s shaping during the baking process.

Top Tips For Fool Proof Gluten-Free Sugar Cookies
- Use a Gluten-Free flour thats a 1:1 ratio or a ’measure to measure’ for this recipe. This step isn’t crucial for all gluten-free recipes but it is for this one. It will help the cookies hold their form thus helping them cut out better. I used Bob’s Red Mill Gluten Free 1:1 Baking Flour but you could also use King Arthur Flour GF Measure for Measure Flour.
- Be sure to refrigerate your dough! After making the dough, it is important to allow at least one hour for it to chill.
- Another tip is to use plastic wrap when rolling out the dough. It makes this step a breeze! Also helps for an easy clean up because you don’t have sticky, floured countertops. Simply place plastic wrap both underneath and on top of the dough as you roll it out.

How To Make Valentine Sugar Cookies {Gluten and Dye Free}
To make these delicious cookies, start by adding softened unsalted butter and white sugar to a mixer with the paddle attachment. Beat until smooth then add the eggs and vanilla and beat again, making sure to scrape down the sides of the bowl.
In a separate bowl, sift together the flour, baking powder and salt. Slowly add to the wet ingredients and mix until just combined. Poor in the milk (or milk substitute of choice) and mix until the dough is formed.
Divide the dough in half, flatten into two discs, wrap in plastic wrap and chill for at least one hour. After the dough is chilled, preheat the oven to 375° F. Roll out dough to ~1/3 inch thick. Because we’re making Valentine cookies today, I used cute heart shaped cookie cutters, but feel free to use whatever you have!
Bake for 7 to 9 minutes or until the edges are a light golden brown, being careful not to overbake. Place cookies on a cooling rack and allow them to cool completely before icing.
Now comes the fun part…decorating!

How To Make The Royal Icing
- 2lbs sifted Powdered Sugar
- 1/3 Cup Whole Milk or milk substitute
- 2 Egg Whites
- Artificial Dye-Free Food Coloring
Place all ingredients in a bowl and with an electric mixer beat together until smooth. If icing seems too thick you can gradually add more milk until you reach desired consistency.
Because we’re making Valentine cookies we wanted to get a little ‘fancy’ and make some fun colors and designs. But as you can see, I’m not going to win a cookie decorating contest anytime soon and that’s OK! My daughter was happy and that’s all that mattered.

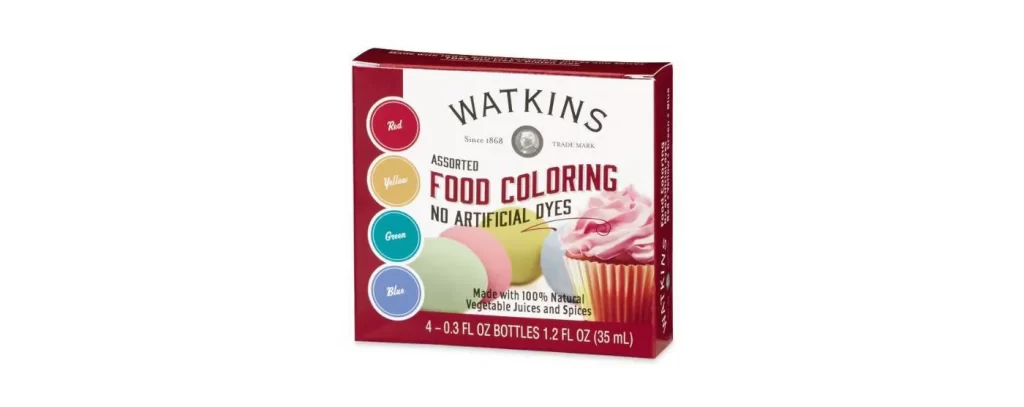
For these artificial dye-free Valentine cookies I used Watkins food coloring. I used a large mixing bowl to make the icing, then spooned out a small amount into a smaller bowl to add the coloring. To achieve this light purple, I added 2 to 3 generous drops of the red gel. We wanted somewhat of a marbled effect so I stirred the gel just enough to incorporate it but not enough for it to all be one color.

You could also easily achieve this look by piping the purple icing onto the cookie then dropping small amounts of white in swirling it around with a toothpick. But again, this is not a decorating tutorial, just what we did. 🙂
I also made fun little heart designs by piping little white or purple dots onto the cookie and drawing a line through them with a toothpick. My daughter loved them!
We were thrilled when we found dye-free Valentine sprinkles as well. These are totally optional, but very cute and fun! I remember spending hours researching, reading ingredients and sorting sprinkles in the past and now they have dye-free sprinkles! I’m so thankful for all the new options these days.

After icing the cookies, allow them to set for 2-4 hours and they’re ready to enjoy.
And there you have it! Simple, delicious and adorable gluten and dye free Valentine sugar cookies. I hope you enjoy them as much as we do.
Looking for more gluten-free recipes? Find them here.

Valentine Sugar Cookies {Gluten and Dye Free}
Ingredients
- 1 1/3 Cup Unsalted Butter
- 1 1/2 Cup White Sugar
- 2 Eggs
- 1 Tsp Vanilla
- 4 Cups Gluten-free Flour (1:1 ratio)
- 1 Tbsp Baking Powder
- 1/2 Tsp salt
- 3 Tbsp whole milk or milk substitute
Royal Icing
- 2 Lbs Powdered Sugar
- 1/3 Cup Whole Milk (or milk substitute)
- 2 Egg Whites
- Artificial Dye Free Food Coloring
Instructions
- Add butter and sugar to an electric mixer. Using the paddle attachment, beat until smooth.
- Next, add the eggs and vanilla. Beat until smooth, being careful to scrape down the sides of the bowl.
- In a separate bowl, sift together the flour, baking powder and salt. Slowly add to the wet ingredients and mix until just combined.
- Pour in the milk and mix until the dough is combined.
- Divide the dough in half and form into two discs. Wrap in plastic wrap and chill in fridge for at least one hour.
- Once the dough is chilled, preheat oven to 375F. Roll out dough to ~1/3 inch thick and cut out desired amount of cookies.
- On a baking sheet lined with parchment paper, bake cookies for 7-9 minutes. Being careful not to over-bake.
- Allow cookies to cool completely before icing.
For the Icing
- Sift the powdered sugar to make sure there are no lumps.
- Place all ingredients in a mixing bowl. Beat together until the mixture is very smooth.
- If icing seems too thick, add more milk as needed until you reach desired consistency.
- Add artificial dye-free food coloring and have fun decorating!

Leave a Reply